Since my last post I’ve done over 15 print attempts.. I fixed a bunch of things during that time, and felt I was making at least some progress, but I’ve realized that I simply won’t be able to print anything real with the Mercury stepper motor I’ve been using for my non-geared, standard Mendel extruder.
Today I ordered a high torque stepper motor with a 3/16″ round shaft (Lin Engineering 4218L-01-10) for around $10. I’ll cut splines into that shaft too (as I did with this one), and hopefully get enough torque that I can dig into plastic enough to get consistent extrusion so I can print a geared extruder (or, one thing at a time, print anything). 🙂
The new stepper motor is due to arrive Tuesday. I won’t be doing much until then.
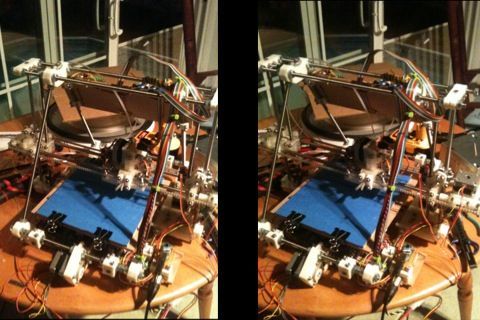
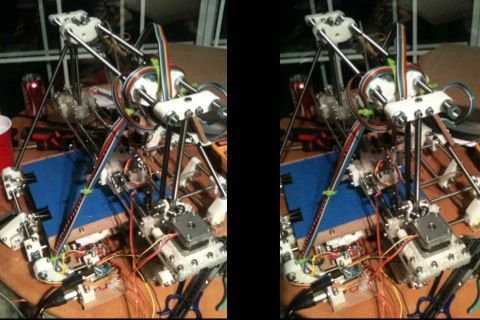
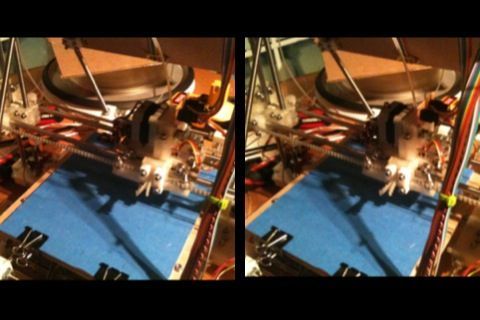
All of that said, here are a few pics and video clips of some of my print attempts up to this point (after a few gratuitous 3D pictures of my Mendel):
NOTE: With the lazy-eye 3D pics, I’ve found it’s best to click on the pictures first, then try doing the 3D thing. WordPress tries scaling these to make them bigger, and in this case bigger is not better – it makes it very difficult to line up the images, and then there are scaling artifacts.. Click the pictures so they’re in their own un-scaled original forms first.
I love this first one – note the wires, the pool in the back, the table beneath it, the foremost threaded bar with the power cables on it, etc.
Look at this next one and see if anything looks “wrong”:
It took me looking at that above 3D image to realize that one of the M8 bolts on the top had almost come off from vibration. I had the actual Mendel right in front of me and didn’t notice it, but the 3D picture had me studying every bit of it and I noticed. 🙂
Here’s one last 3D pic:
Ok.. Here was video of JeffTry6, where I briefly got optimistic enough that I almost sound like that “double rainbow” guy (shiver):
Here was the result of that:
..and me talking about that:
So then I went about doing the math to determine what the number of steps/mm I should have for Z, and for that matter, for X and Y. I have McMaster pulleys (McMaster part# 57105K11) for my X, Y, and Z stepper motors, which have a larger diameter than the printed Mendel pulleys. For X and Y it’s easy:
// One step is the circumference of the pulley divided by the number of steps)so
1 step = (McMasterPulleyDiameter * π)/ 400 mm
1 mm = 400 / (McMasterPulleyDiameter * π) steps
(where the 200 step (1.8˚) motors are in half-stepping mode, so we use 400)
That means my X_STEPS_PER_MM and Y_STEPS_PER_MM are 7.869315719200254 (I put 7.8693).
For Z there are two gear diameters and the leadscrew pitch to deal with too. For Z, my math was:
// 1.25mm pitch screw, 1 full turn, 1.25mmzso
1.25 mm-of-Z-travel = (RepRapLeadscrewGearDiameter * π) mm-of-belt
1 mm-of-belt = 1.25 / (RepRapLeadscrewGearDiameter * π) mm-of-Z-travel
Then combine that with the previous equation for 1 mm-of-belt from above:
// Same as aboveand you get
1 mm-of-belt = 400 / (McMasterPulleyDiameter * π) steps
400 / (McMasterPulleyDiameter * π) steps = 1.25 / (RepRapLeadscrewGearDiameter * π) mm-of-Z-travel
which reduces to:
1 mm-of-Z-travel = (RepRapLeadscrewGearDiameter / McMasterPulleyDiameter) * (400 / 1.25) steps
Maybe my measurements were wrong, or I’m taking the diameter of the wrong part of the gear.. My X/Y value seems ok, but my Z value didn’t work in practice. McMaster’s site says the diameter of that pulley is .637″ (16.1798mm). I measured the RepRapLeadscrewGear at around 1.125″ (28.5750mm). That gave me 565.1491 steps of the Z-axis motor to move the X axis up or down 1mm. So I set Z_STEPS_PER_MM to 565.1491 (in firmware, and also in the Preferences page), and it didn’t turn out right. It turns out the correct value through experimentation was 672. If someone wants to tell me where I got my math wrong on that one, I’m all ears (but again, it could just be the wrong measurement). And by the way, thanks to Laurie for verifying the math by solving the problem independently from me so we could compare our results.
Here’s how I determined the Z_STEPS_PER_MM through experimentation:
At some point after this I realized to my shock that when the nozzle moved towards the right on the X axis, the nozzle raised higher and higher above the bed. I’d previously spent time making sure this wasn’t the case, so I worried about how that had happened. The first thing I did was check the bed height with the spacer piece, and determined that the bed was correctly leveled. Then it hit me and I felt crazy for not having seen it immediately – the right leadscrew was somehow now a few turns higher than the left leadscrew. I think this happened when I’d been working to fix the Z axis problems I had a month or two ago. Anyway, I loosened the Z belt, adjusted it meticulously, tightened everything up again, and that’s all fixed now.
Then I proceeded to do more attempts at printing. JeffTry10 didn’t look very good at all..
Then another..
The best example of the fact that I’m not consistently extruding but rather dribbling with some slight push was this attempt at printing a 40mmx40mmx40mm cube, which I only let go for maybe 2 layers before aborting:
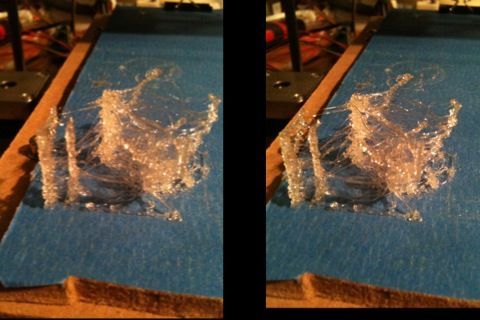
Before deciding to buy a new stepper motor with higher torque, I figured I’d give it one more try, this time changing the extruder firmware to use full steps instead of half steps, which I think should increase the torque. I certainly got more plastic out, but as you can see, it’s still not extruding correctly:
Here’s one more 3D picture of that print attempt, then a picture, then video:
That’s it for now. More next week!


Dedicated Proxy
I found a great…
Cheap Shared Proxies
I found a great…
Jerome Stinebaugh
I found a great…
Carlo Rynerson
I found a great…
Buy Shared Proxies
I found a great…
Wilfred Fogal
I found a great…
Kacie Kaffka
I found a great…
Sherwood Groetken
I found a great…
My Private Proxies For Free
I found a great…
Buy Private Proxy
I found a great…
Pirate Proxy Bay
I found a great…
Anh Zicherman
I found a great…
Twitter Proxies
I found a great…
Ssl Proxies
I found a great…
Buy Proxies Bulk
I found a great…
Refugio Ginnery
I found a great…
Get Proxy Ip
I found a great…
Private Internet Access Proxy List
I found a great…
Proxy Buy
I found a great…
Buy Bulk Proxies
I found a great…
Barry Seaholm
I found a great…
Buy Proxies Cheap
I found a great…
Free Proxies Websites
I found a great…
Buy Http Proxies
I found a great…
Best Proxies
I found a great…
Gretta Klemetson
I found a great…
Best Private Proxies
I found a great…
Sslprivateproxy
I found a great…
Seo Proxy
I found a great…
Fast Private Proxies
I found a great…
Where To Buy Proxy
I found a great…
Myprivateproxy
I found a great…
Barry Dreitzler
I found a great…
Gladis Laorange
I found a great…
Dream Proxies
I found a great…
Chieko Urps
I found a great…
Zana Starghill
I found a great…
Van Ako
I found a great…
Stephen Towle
I found a great…
Mercedes Welcome
I found a great…
Shakia Bellish
I found a great…
Stefan Borre
I found a great…
Shila Wachob
I found a great…
Florrie Shabazz
I found a great…
Deshawn Mcmilliam
I found a great…
Shemika Stellmacher
I found a great…
Fredericka Islam
I found a great…
Kristy Kirschner
I found a great…
Terence Ashraf
I found a great…
Annie Kentner
I found a great…